|
|
Synths |
| Last Updated: | |
| PAiA 9308 FatMan Rackmount Midi Analog Synth #3 | |
| | PAiA FatMan | PAiA FatMan#2 | PAiA FatMan#3 | FatMan Mods | | |
|
|
Synths |
| Last Updated: | |
| PAiA 9308 FatMan Rackmount Midi Analog Synth #3 | |
| | PAiA FatMan | PAiA FatMan#2 | PAiA FatMan#3 | FatMan Mods | | |
PAiA FatMan #3!!
![]()
| PAiA FatMan #3 - 2u Rackmount |
|---|
|
Yes, call me insane. This is my 3rd Fatman. Well, I picked this one up i think around January 2005. It's built, quite new, fully working and around US$90. Hey, I thought, I couldn't even order the kit for that price, and this one's fully working. |
|
|
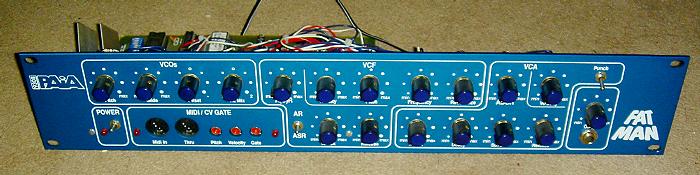
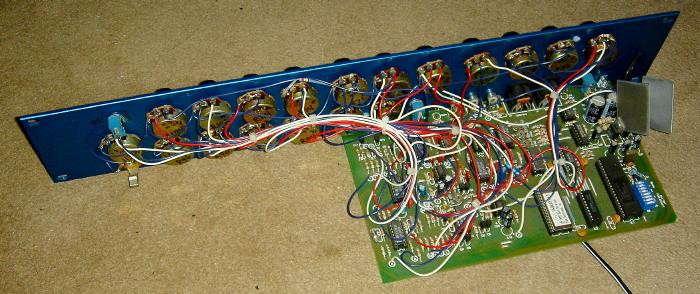
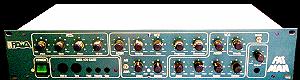
| So it came to me like this... |
|
|
|
This one (as opposed to the 2nd Fatman which I also bought built), came with newer v1.9 firmware, and the builder actually did quite a good job on it. |
|
So it spent nearly 1/2 a year sitting on the shelf, and in July 2005 I finally decided to bring him to life. (Actually, I couldn't stand it just sitting there, and starting to gather dust. Thought maybe I should quickly give it a proper rackcase, so at least it can start functioning, and not just sit there "being fat"!) |
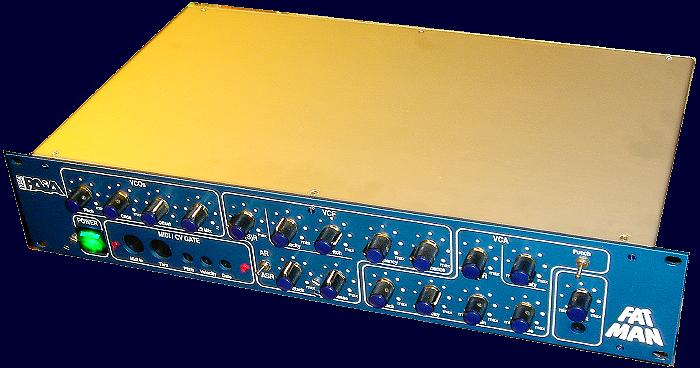
| The FatMan #3 - 2u Rackmount |
|
|
| Well, there were a couple of things in mind... either make this a Stereo Fatman - but that requires either getting a 4th Fatman or dismantle Fatman #2. Or I could just rackmount it, in nearly its original form - since my other 2 Fatmans are both in custom 1u cases, I've not got an ''original'' Fatman! So say we all - let it be fat then. |
|
I got a spare 2u 19'' case around, but, it's kinda not very
standard - as the Front Panel is another one of those that has right
angled sides on the top & bottom, with screw mount holes. I thought maybe I can just find some right angled mounting L brackets, and so I did. |
|
I'm not gonna go thru how to rackmount this, I also didn't
take any pictures. But basically, I moved the MIDI In / Thru, the CV Outs to the back, and then added the standard IEC Mains Inlet Socket, a transformer and also put a Rocker Power Switch on the front. |
|
|
| GENERAL MODS | ||||||
| Well, I tried to keep it as original as possible, but there are a few tiny mods that have to be done. | ||||||
|
The must-do Lee Diodes, 7555 and VCO Pitch were done.
-> See the MODS page for details of these MODS. |
||||||
| Notes: Most of these mods are from Scott R. Gravenhorst's excellent Synthaholic's Fatman Site. | ||||||
|
||||||
|
I didn't bother with the other mods, not even the VCOs Sync or Filter Extend. |
||||||
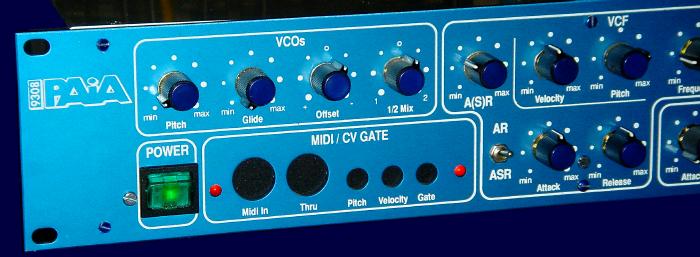
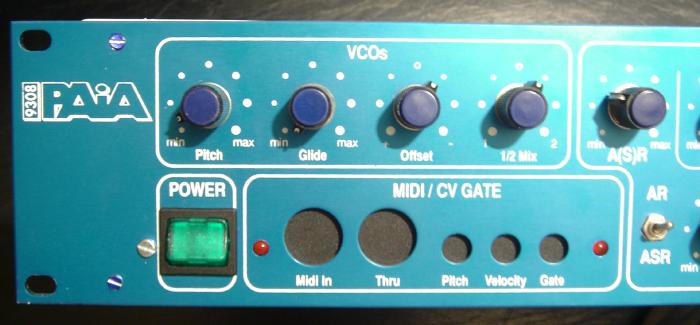
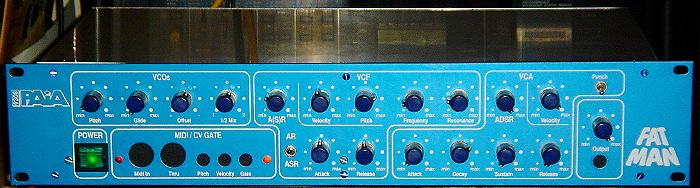
| THE FRONT |
|
|
|
The Front MIDI In/Thru and CV/Gate plus the Audio Out are
now routed to the rear panel of the rack. So I just "Blank Out" these
empty holes. It's actually very low-tech DIY. I cut out some spare DVD blank cases, and tape it on the back of the front panel. With the MIDI/CV/GATE, this bit of DVD Box actually covers the 2 LEDs and the AR Switch. I just re-drilled thru the plastic to let the LEDs and switch pass thru. (This also helps holding the plastic in place, cos taping it is kinda fragile - otherwise it could break if you "poke" the blanking black bits!) |
|
|
|
Note: To make the square-ish hole for these illuminating Power Switch, another one of these Hand Hole Cutter is needed. This one is the M10 rectangular hole cutter,22x19.6mm, RS Code: 600-161. The Power Switch is one of those DPST green (or red) illuminated rocker switch, 10A/4A. RS Codes are Green: 318-070, Red: 318-064 |
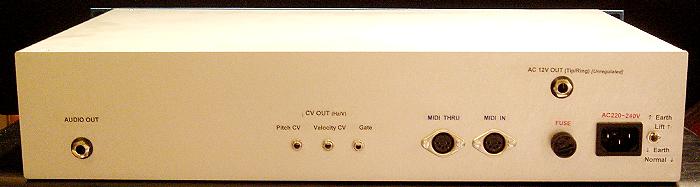
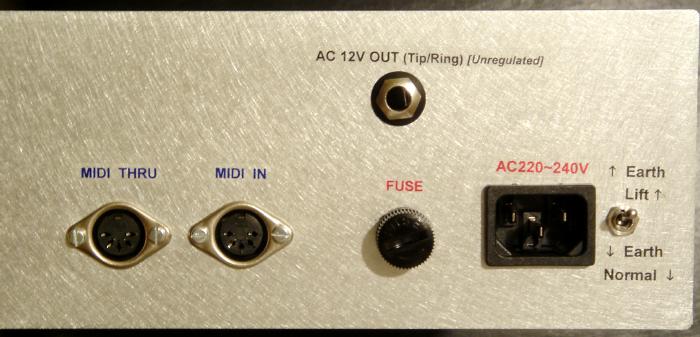
| THE REAR |
|
|
| This case is actually quite nice, silver-ish, not black, so I used transparent stickers for labeling! |
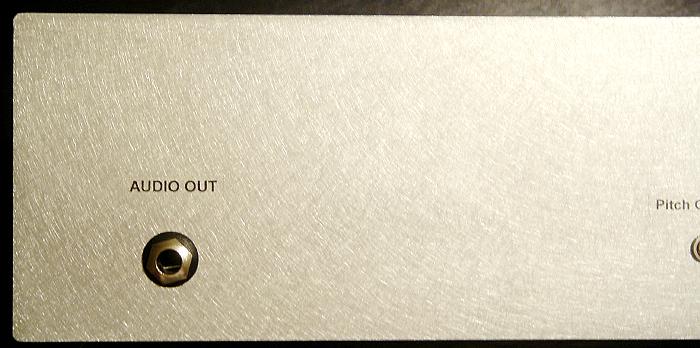
| On the Left: |
|
|
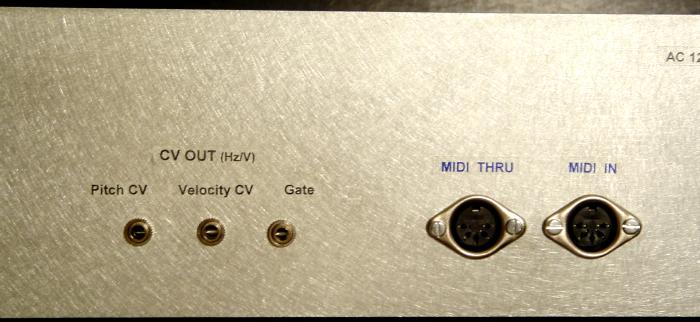
| In the Middle: |
|
|
| On the Right: |
|
|
| Well, there's the IEC Mains Inlet Socket and FUSE Holder. |
|
I also made an Earth Life switch, that life the Ground from the Mains input. |
|
Also, since I have had under-powered Fatmans before, this
time I used a big dual 6VA 12V AC transformer - I only used one side of
it, which should be enuf for the Fatman's power requirement. The other AC 12V 6VA, I routed to a stereo jack socket on the back, wired to the Tip & Ring, in case any equipment nearby needs AC12V - then it can be powered frm here instead of a wallwart! |
|
|
| Note: To make the IEC Mains Inlet hole, I use a screwing hand tool, which is an M10 Radius Hand Hole Cutter, 28x21mm (RS Cat.#543-614 or or 541-501), with matching 10A Snap In PCB Mount IEC 320 Plug Socket ( |
|
|
|
As of 28th July 2005 |
![]()
| Some Comments on 3rd FatMan... | ||
|
|
||
|
||
|
||
|
![]()
![]()
![]()